 |
|
|
|
KYTUN SLATE & TILE TRIM SYSTEM INSTALLATION GUIDE - STAGES 1,2 & 3 |
   |
|
 |
 |
 |
Stage 1 |
Stage 2 |
Stage 3 |
|
Starting at the base of the roofline,
position the tile trim against the
battens, secure it and place the
internal rubber joiner on the
upper end of the trim.
|
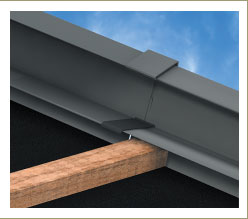
Allowing a 5mm gap for expansion,
position the second length of the
tile trim into the rubber joiner, and
join both lengths using the external
joiner piece.
|
Finally the top ridge unit is fitted at
the apex and secured using the
innovative butterfly fixing
mechanism (see image above).
|
|
|